Recent Posts

Showing posts with label Onions. Show all posts

Wednesday, June 16, 2010

When Life Gives You Onions...

When life gives you onions, don't cry. You can always make jam! Granted, you may cry a little in the process, but it will be worth it in the end. Last year I made my first batch of jam with the last of the fresh summer tomatoes. Within a couple weeks we had devoured it and the summer farmer's markets were well over. Since then, I've been wanting to expand my jam repertoire. Thanks to Daniel's canning adventures last week and the extra mason jars we had lying around, I quickly felt the urge to jam.

Like many delights from the kitchen, making jam is not nearly as daunting a task as you may think. Just keep stirring! This onion jam recipe yields a buttery onion spread that offered a burst of sweetness and delectable onion flavor that will make even a piece of dry toast dance across your palate.I used vidalia onions for this recipe because they are sweeter and have a higher water content. More natural juice means you don't need to add liquid and more onion flavor.
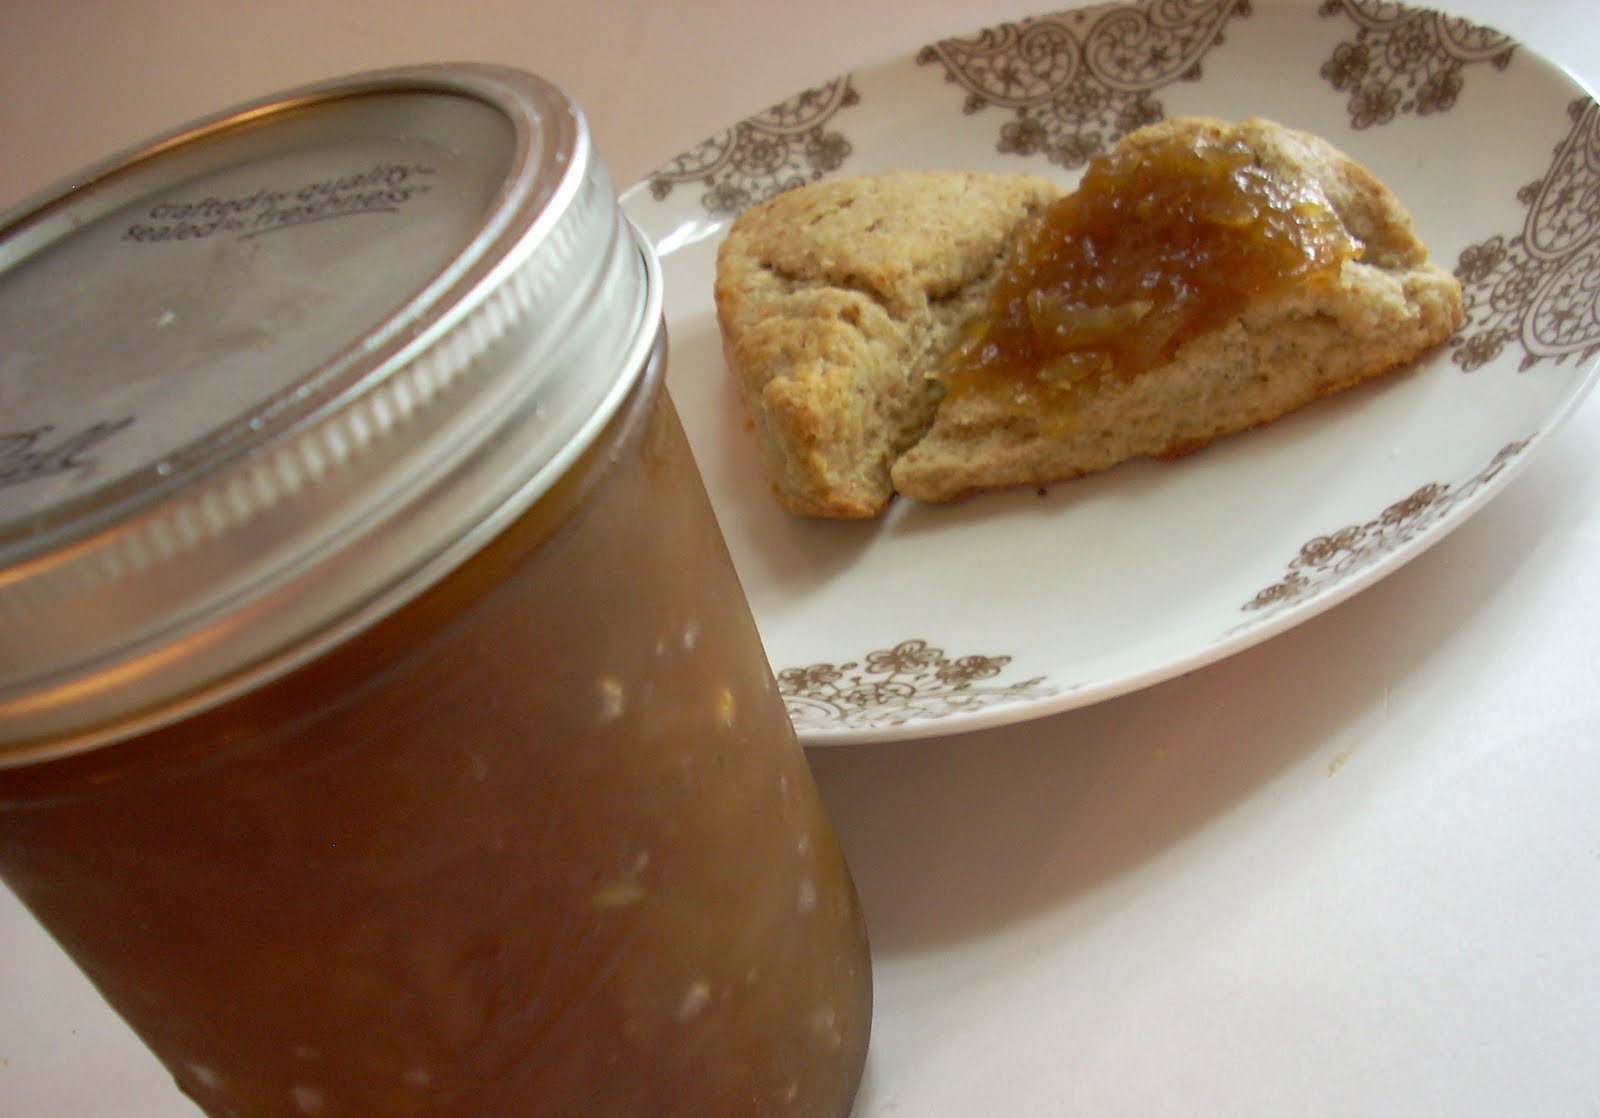
Onion Jam

Although there are plenty of alternatives you could throw in our substitute, for this batch I wanted a strictly aromatic onion jam with a nice caramel color and a burst of sweet onion flavor.


3 lbs Vidalia Onions, halved and quartered
1/4 Cup Olive Oil
1/2 tbsp salt
1/2 Cup Brown Sugar
2/3 Cup Sugar
2 tbsp vinegar

1. Place oil and onions in medium stock pot. Season with salt and stir onion quarters to coat with oil. Place over medium heat and cover with tight fitting lid. Allow onions to cook 20-30 minutes until tender, checking s little as possible.
2. Add both sugars and vinegar. Stir to dissolve and coat onions evenly.
3. With medium heat, using a wooden spoon stir occasionally at first, and more often as it gets closer to being done. As you stir, use the spoon to begin squashing onions. Continue cooking and stirring until you reach desired consistency.
4. Place in glass jars, allow to cool, and seal.
5. Enjoy!

There are a plethora of options for you to choose from as you decide where to use your delicious homemade goodies. I already have plans to use it on a bacon tomato foccacia and am contemplating a savory thumbprint cookie. But, since we weren't going to be able to try them until this morning, I choose to use them in our breakfast fare atop some warm rosemary scented scones. Whatever you choose to use it on, you and whoever you choose to share it with will be delighted.

Rosemary Scented Scones

The rosemary in these provides a subtle herbaceous note that pairs beautifully with a slightly sweetened scone on its own, and becomes a delectable breakfast treat with the extra sweetness and onion goodness from your own onion jam

1 Cup All Purpose Flour
1 Cup Whole Wheat Flour
2 Tsp Baking Powder
1/4 Cup Sugar
1 Tsp Dried Rosemary Powder
4 Tbsp Butter
1 Egg
1/2 Cup Half & Half plus additional for brushing
Himalayan Pink Sea Salt for Sprinkling

1. Preheat oven to 425. Line baking sheet with baking mat. Mix flours, baking powder, sugar, and rosemary in bowl to combine. Cut in butter until mixture resembles crumbs.
2. In a separate cup, mix egg and half & half. Once combined well pour over dry ingredients and stir until mixture just comes together.
3. Remove mixture from bowl (there may be some dry ingredients left behind, don't worry), and pat into a circle on baking sheet. Cut circle into 4 or 8 wedges depending if you want small or larger scones.
4. Separate across baking sheet and brush with half & half. Sprinkle with pink salt and place in oven.
5. Cook 10-15 minutes until golden brown.


Enjoy!

Saturday, March 20, 2010

Oh, Sweet Pea


I'm not sure how the weather has been for everyone else these last two weeks, but here it has been absolutely gorgeous. Rather than quickly jaunting from place to place, I found myself slowing down to enjoy the perfect early spring weather. As soon as Daniel or I got home, the windows were opened to take in in the crisp spring air. To celebrate being one step closer to the Farmer's Markets that will kick into gear later in the spring, I put together this bright Friday Night concoction.


The cornucopia of possibilities that instantly spring to mind as I take a precious ball of our pizza dough from the freezer is perhaps the single reason Daniel and I enjoy making pizza so much, and do it so often. You may notice it comes up often on here, but trust me, there's plenty of more pizza baking going on, usually about one a week.. There's just so much you can do with a few simple, straightforward ingredients and flavors. For this particular pie, for example, I went through a few different possibilities. Originally planning for an arugula centered concoction, I was disappointed to discover its absence, as the fresh produce is at that odd juncture between winter and spring. Instead, I replaced the peppery bite of arugula with the sweet refreshing bite of the green pea to make a bright green sauce for a vivid March welcome to spring. 


Green Spring Pizza
Prepared Pizza Dough (recipe available here)
Green Pea Pizza Sauce (below)
2-3 Slices Prosciutto
1/4 Cup Freshly Grated Parmesan
1 Medium Sweet Onion, Halved, Sliced Thinly, soaked in Balsamic Vinegar for 1-2 hours
Cornmeal for covering pizza stone and pizza peel
Directions:
1. Place pizza stone in oven and preheat oven to 475 at least an hour before cooking.
2. Lightly cover pizza peel with cornmeal to prevent sticking. Stretch pizza dough to desired size. Spread pizza dough to coat pizza thinly. Top with onions, prosciutto, and grated parmesan.
3. Place cornmeal on pizza stone and carefully slide pizza onto stone. Bake 10-12 minutes. Remove from oven once crust begins to brown. Let cool slightly before cutting. *Garnish with additional parmesan cheese if desired.

Green Pea Pizza Sauce
3/4 Cup Green Peas
Small Handful Baby Spinach (Stems Removed)
1 Tbsp Olive Oil
Juice and Zest from 1/2 One Medium Lemon
Salt & Pepper to Taste
Directions:
1. Combine all ingredients except salt and pepper in blender.
2. Puree, blending until smooth, adding extra olive oil if needed. Mixture should be smooth but will be thick. Season with salt and pepper to taste.

Tuesday, January 19, 2010

Just the Highlights


I feel like I should have so much to say about our trip. Besides suggesting that you voice an objection when someone mocks the culinary experience of London however, I really don’t have much else to say. We definitely did not go hungry. Vegetables and fruits were perhaps less prevalent, but that could have more to do with ordering in an ‘on vacation’ mentality than anything else.

I did decide upon our return that clotted cream should be illegal because of how bad it is for you, but oh how decadent it is on a freshly baked or toasted scone. I wish I could make some at home, but too bad its illegal to purchase the unpasterurized cream needed to make it. Unless I've been mislead about this little fact. Oh please let me have been mislead.

That’s about it as far as insights go. I do have a renewed interest in tea, but perhaps another time. Suffice to say, we had a blast. What I found most impressive though was how stores, even the major chains of grocery stores privileged locally grown, cultivated, butchered, etc., products. This was not just to be found in our trip to Borough Market, but in wondering into small grocery stores and convenience stores near our flat as well. Despite the abundance of fresh ingredients that would have made cooking in our tiny flat fun, we ended up not doing much cooking there because, well 1. All of the walking & sightseeing we did which kept us out and about from morning to evening and then some; and 2. Did I mention the flat was tiny? Really it wasn’t, to be fair, the flat wasn’t that small and had a huge bathroom. I was actually referring to the kitchen. The kitchen was literally big enough for one person to do a 360 in to cook. Not very effective for us.

So, what I have to share with you is not actually a recipe we enjoyed on our trip, although Daniel did have something similar at the Rose & Crown Pub in Oxford served with mash instead of pastry. BUT, the dish does highlight a few decadent things we enjoyed while there. Specifically, butter and beef. I was never impressed by shortbread cookies to be honest. And then I had one in London. Or three. In one day.

Although the dish isn't from our trip directly, I hope you'll enjoy it nonetheless as a dish that holds a special place in our hearts. Inspired by a British pub we tried during our honeymoon in St. Augustine, it seemed an appropriate way to integrate some of things we loved from our trip with our life back home. 


Beef & Guinness Pie
2 LB Cubed Beef Chuck
2 Tbsp Flour
1 Tsp Salt
½ Tsp Pepper
2-4 Tbsp Vegetable Oil (NOT OLIVE OIL)
1 Large Onion
1 Cup Halved Mushrooms (Cremini or whatever you have)
2 Garlic Cloves
3 Tbsp Water
1-1/2 Tbsp Tomato Paste
1 Cup Guinness
1 Cup Beef Stock
1 Tbsp Worcestershire
2 Tbsp Peppercorns
2 Tbsp Thyme

1.Preheat oven to 350. Stir flour salt and pepper together in bowl. Pat cubed meat dry. Toss cubed meat and flour mixture to coat.
2.Heat oil in oven proof pan until hot and almost smoking. Brown beef in three batches turning occasionally. Remove meat and place in bowl.
3.Quickly add mushrooms, chopped onions, chopped garlic and water. Cook until onions are softened (about 5 minutes), and stir using a wooden spoon to scrape the bits from the pan while onions cook.
4.Add tomato paste, cook and stir for one minute. Add beef, beef broth, beer, Worcestershire sauce, peppercorns, and thyme. Bring to a simmer over medium high heat.
5.Cover an transfer to oven. Cook approximately an hour and a half.
6.Remove from oven and cool uncovered for at least thirty minutes.
7.Preheat oven to 425. Divide beef between shallow dishes and cook approximately 20 minutes. Reduce heat to 400 and cook 5 more minutes.
8.Serve with puff pastry prepared as directed.

Although the pie calls for Guinness, any strong stout would work well, we’ve used a Murphy’s stout that worked well in the past. Typically, if we have time, we try to do steps 1-6 one day, let it cool, and then refrigerate it over night for the final bake and puff pastry the next day. This gives it a little more flavor, and makes it slightly more convenient to have a delicious meal relatively quickly.

For the puff pastry, I used the little bit I had left from my first Daring Bakers Challenge (still as decadent). If you happen to have some homemade in the freezer or already made, use that, otherwise just use what you have.

Enjoy!

Sunday, August 30, 2009

French Muse

After you have made several of your own pizzas and you experience the variety and quality that can be achieved in-house, carry out or delivery become less appealing. From time to time, certain pies are an adequate substitution for homemade, but last week I wanted to venture outside the realm of familiarity and try something unique. I have become more and more fascinated by French cooking lately (and this is not merely because of "Julie and Julia" which I have not seen) and the other night a Pissaladière struck my fancy.

On a side note, the last pizza stone Dawn and I had lasted several pizzas before it ended in shards after I forgot to place the stone in the oven while it was preheating. This was an instant learning moment and one of those cooking experiences that leave you wiser for the future. Ever since then, the new stone has performed well on the prior pizzas and this one as well.

This Southern French "pizza" as you could call it consists of a caramelized onion base instead of the traditional tomato base often used in Italy. Pissaladière's are loaded with bursting flavors due to the length of time the mound of onions are allowed to cook in the oven with the bits of thyme and rosemary hiding inside to infuse flavor.

Resting on top of the herb infused onions are the anchovies. I realize that anchovies are greeted with hostility and sneers by many Americans because of their pungent odor and salty nature, mostly due to the brine they are packed in. Whether you are on the reluctant team or the robust flavors side, the combination of onions, herbs, mushrooms, and anchovies in this dish is incredible. I chose not to rinse my anchovies prior to placing them on the Pissaladière, but it is a judgment call based on your taste buds. One way or another, these morsels of fishy goodness will leave you wondering why you never forgo tomato sauce for caramelized onions at least when you have a can of anchovies in the cabinet. That, or why you never venture farther than the comfort of Caesar dressing.

Pissaladière Crust
Enough for approximately three to four crusts.
2 (1/4-ounce) packages active dry yeast
4 1/2 to 5 1/2 C. unbleached all-purpose flour
1 1/2 C. water (105–115°F), divided
1/4 C. extra virgin olive oil
2 t. salt
Corn meal for dusting

Whisk together yeast, 2 Tbsp flour, and 1/2 cup warm water in a measuring cup and let stand until mixture develops a foam, about 10 minutes. (If mixture doesn’t foam, discard and start over with new yeast.)

Stir together salt and 3 cups flour in a large bowl. Add yeast mixture and remaining 1 1/2 cups warm water and stir until smooth, then stir in 1 cup more flour. If dough sticks to your fingers, stir in just enough corn meal, a little at a time, to make dough just come away from side of bowl. This dough may be wetter than other pizza doughs you have made.

Knead dough on a lightly corn-mealed surface, lightly remealing work surface and hands when dough becomes too sticky, until dough is smooth, soft, and elastic, about 10 minutes.
Divide dough in half and form into the desired size balls, then generously dust balls all over with corn meal and place in medium bowls. Cover bowls with plastic wrap and let dough rise in a draft-free place at warm room temperature until doubled, 1 to 1 1/4 hours.

Before rolling out, balls of dough can be generously dusted with corn meal for added crunchy texture if desired.